Showing posts with label quilts. Show all posts

Fall

We're having a glorious fall here in WV. I have a very love hate relationship with fall. I enjoy sweaters, warm cozy blankets, pumpkin flavor (the real thing) as much as the next lady, although I hate the cold. I hate snow, winter, icy roads. So I grieve the loss of summer and look forward to the warm weather again.
{This is the view from my back porch. I little slice of heaven if you ask me!}
I think part of my fall funk has been my disappearance from blogland. I probably have hundreds of other blog posts to read, but I just can't bring myself to sit in front of the computer for any length of time. I did recently figure out how to remove the THOUSANDS of duplicate photos from my hard drive crash last summer.  (If you have a mac and need to remove duplicates check out the Duplicate Annihilator app.)

 I have been doing some crafting. I have so much to share and show you, but I also have bathrooms that need cleaning, an entire house that needs dusting, and lots of floors that need vacuuming. I've pinned a few nifty printable charts and I'm hoping that might help me stay on top of my cleaning.

In my last post I shared that my family welcomed it's 48th member. I made this quilt for the new little guy. I hope he enjoys snuggling with it's flannel-goodness as he grows.


And yesterday, this little guy started pre-school. It feels like he was just born. Since my last post, this guy turned THREE. I'll have to share a few things I made to help celebrate. In the meantime, I'm happy he LOVES his binoculars that he made at school. Too cute!

Facebook Comments Plugin Bloggerized by BloggerTricks.Biz

One more baby quilt, as if I haven't made enough lately.

Yes, I've told you about the baby boom I'm in the middle of, I know.

I shared with you this quilt that I recently finished. As well as this quilt. Sadly, that's not enough for even HALF the the babies I've got coming in 2011!

One of my dearest friends (my husband fully acknowledges and accepts that SHE is my soul mate & says if something should happen to our husbands we could/should form a domestic partnership) asked if I might be able to help her come up with the perfect baby gift for her friend that delivered 6 weeks early. Of course I could squeeze in one more quilt...

This is what I put together for her:


I folded over the backing to create the mitered corners for this quilt--this is a new favorite technique for me.
Facebook Comments Plugin Bloggerized by BloggerTricks.Biz

More Quilting

I know, I know. I'm sure you're sick of seeing all the quilts I've been working on. I'm thrilled that I finished ANOTHER baby quilt yesterday.

My lighting was not great during this "photo shoot" but at least you can see the fabric & get the idea of what I made.

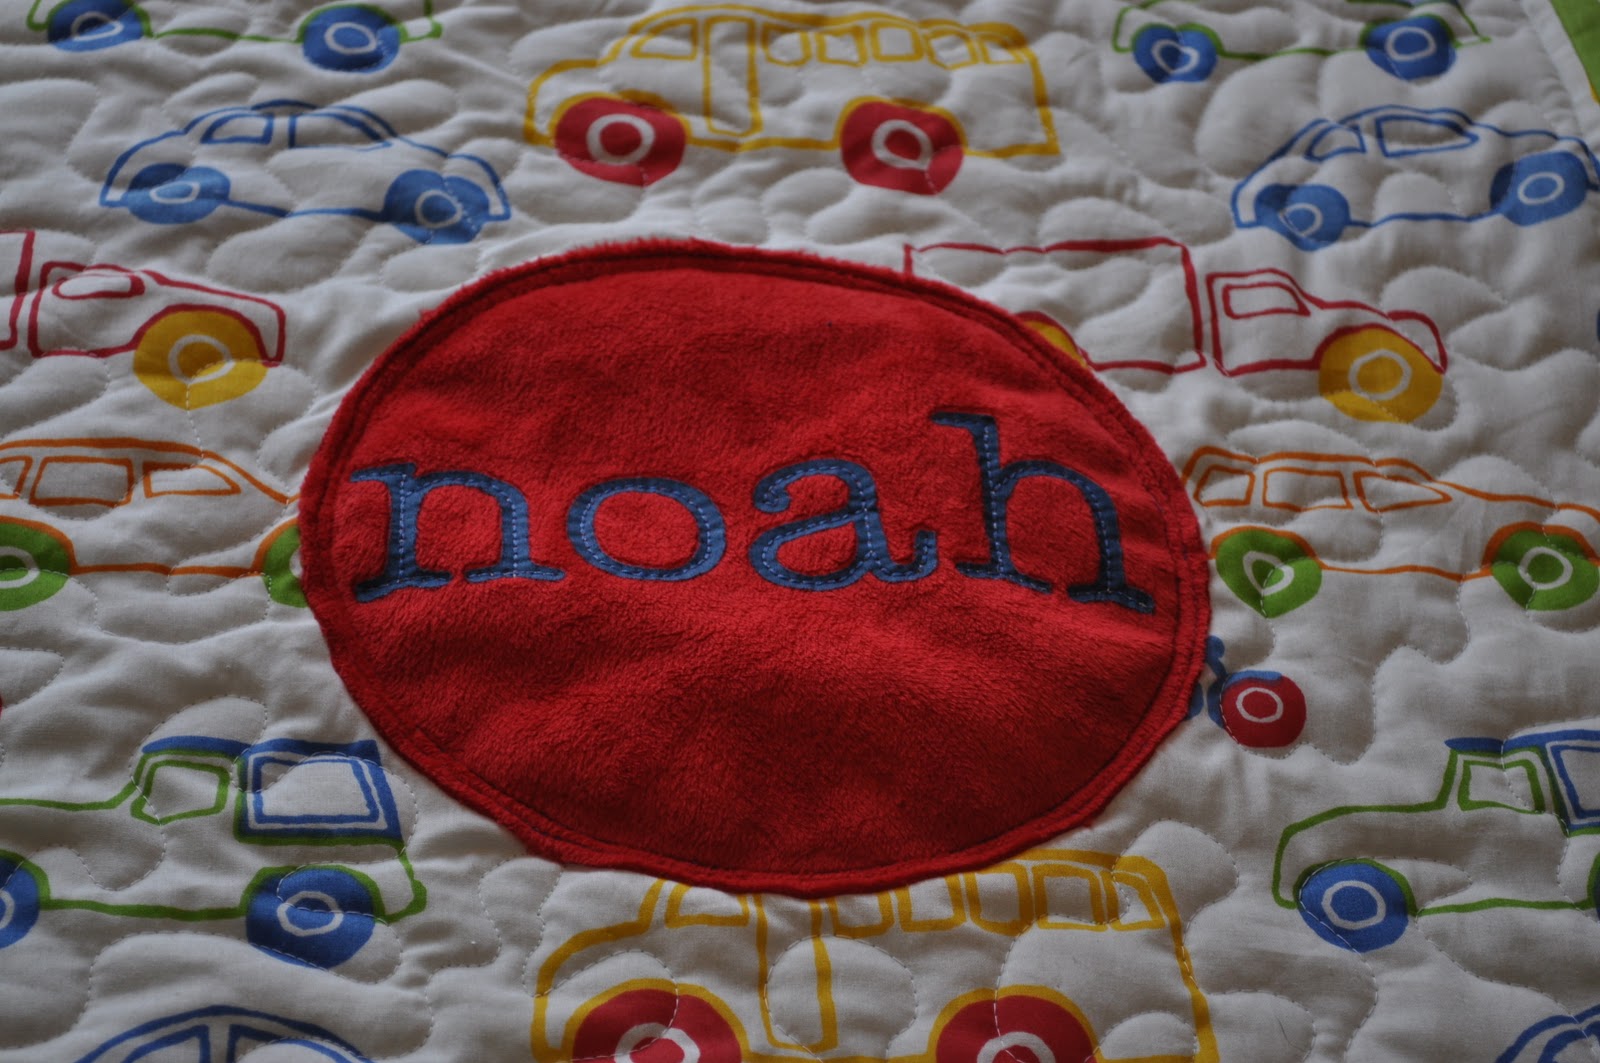
I did personalize this beauty, so once the baby arrives, I'll be sure to share the full detailed view.

Facebook Comments Plugin Bloggerized by BloggerTricks.Biz

T Shirt Quilt: {Quilted}

Yesterday I bit the bullet and finally quilted the t-shirt quilt. I started a little before 3 and was done before 6 pm. (Thank Goodness for LONG naps!)

I want to say I used maybe 8 bobbins, and probably will need to go back to make a couple "corrections" in that I know there are a few extra-wide stippled stitches. But for now it will do. Now just to trim off the excess and put a binding. Yahoo!


Facebook Comments Plugin Bloggerized by BloggerTricks.Biz

T-Shirt Quilt {time to finally finish?}

So back in AUGUST, I shared a t-shirt quilt that I was working on for my husband.

Not that we need more quilts, but more of a means of saving some cherished t-shirts that were cramming his drawers. I put the entire thing together fairly quickly, but then it came to the quilting part and the project completely stalled. And when I say stalled, I mean, I put the quilt top in the closet and forgot about it since August. I knew I needed to finish it. Ideally before I was knee deep in new-baby-ness. So, now I'm in the final trimester, and is the quilt done: of course not!

I finally ordered some cheap extra wide quilt backing from fabric.com, not exactly what I had in mind but I never like to spend a lot of money on backing. I've had the fabric for a few weeks, and over the weekend I finally washed it, and yesterday during my son's nap I finally ironed it, and layered the quilt!

Layering a quilt is a major job in my mind. I hate to admit that I sort of hate doing it. My mother in law and husband's aunt have perfect tables to clip the quilt layers to, and it's always more fun with the 3 of us pinning a quilt. Maybe I was waiting to finish this to have a chance to pin it with them....but yesterday I cleaned the sewing/guest/new baby room and pinned the quilt to the floor to get the job done.

I realized though I don't have black thread....so today, I'm going to get black thread and I'm going to start quilting this monster. Hopefully this will remind me again to only sew baby quilts!
Facebook Comments Plugin Bloggerized by BloggerTricks.Biz

Looking back...quilts

I had a chance today to sit back and look at some old pictures. I came across a handful of quilts I've made recently (and not SO recently...) it was a great walk down memory lane. I figured I'd share some with you:

I made this "transportation" quilt for my son, we keep it in the car...
This is my son's bedroom quilt....unfinished, but so close...you get the idea

Last year I travelled to Cape Cod to visit with college friends, I made all of the children personalized fleece blankets (which I never took pictures of) but Bridget sent me this one...she's a college friend, I made it in our school colors, and hers is nice & LONG (unlike the ones for the kids)
I made this precious quilt for our friend's daughter, Caroline. I love the bright colors...the images on the front are intended to mimic the backing fabric...
I made this quilt for my college roommate's son, she had a Winnie the Pooh themed room, and I was able to find "vintage Pooh" fabric. So sweet! 

This is an unfinished picture of the quilt I made for my nephew. I just loved the bright colors and the alphabet blocks....I figured he could grow into it.

I'm starting to realize I need to be a little better about taking pictures of the quilts I give away. I know I've made more quilts....it's just a matter of finding the pictures....
Facebook Comments Plugin Bloggerized by BloggerTricks.Biz

Baby on the brain...

I feel like I've said it a million and one times now, but I'm in the middle of a baby boom so most of my creative excitement has been constructing & creating items for babies. I'm definitely NOT complaining, because I love making little things for new little people.

One of my favorite projects is a very simple personalized quilt. I've shared other quilts with you before, but the personalized quilts are just so cute! It's perfect for hanging on the wall in the baby's room, or over the side of the crib, but I feel like my quilting is more the "use it" quilt, it's not museum or show worthy (in my opinion!) which really means it's perfect for throwing over the car seat, or stroller...

I made this quilt for my college roommate Amy's neighbor who was just blessed with her second baby, a girl, Emily. Nicole (Emily's mom) saw the quilt I made for Amy's daughter Abigail and raved about it, so Amy figured she knew the perfect gift for Nicole's new daughter! This quilt is maybe 40" square, with rounded corners and a hot pink rick rack edge. Nicole didn't want anything too girly, but I think this quilt is the perfect blend of being a girly without being ALL pink!


Last year I started making a personalized fleece blanket. It's perfect for the winter and is honestly something that my son ultimately sleeps with every night. It's so easy to construct, I'll have the make a tutorial the next time I make one. My friend Emily's son Benjamin is turning 1 in a few weeks and I figured it would be a great birthday gift (along with a matching Eagles outfit, of course!) Here is the finished Benjamin blanket:


Facebook Comments Plugin Bloggerized by BloggerTricks.Biz

Gifts for Babies

I think there is nothing as wonderful as a new quilt for a new baby. Lately I've been all about PERSONALIZED items...because what's better than a new baby quilt but a new baby quilt with the baby's NAME on it! :) ...it's the little things in life, right?!

Well, my friend has received the package...in it she found: 

*A name banner (I know the wooden ones are all the rage, a la Pottery Barn) but this was literally SO easy to create. Simply print off the baby's name in a large font, have your printer reverse the type--possibly Iron On Transfer style--once you have the name printed in reverse, carefully cut out the letters. I used a circle cutter to cut one circle per letter-again-so easy! If you don't have a circle cutter, simply use a round object-a plate, bowl, the edge of a cd...-to trace around. Glue the backside of the letter onto the circle. I used mini-clothes pins (my new favorite!) and attached each letter/circle to an ironed a long piece of twine, so it would lay flat. If you don't have clothes pins, you could hole punch and tie your letters on too... 

*This quilt for baby Abigail. Again, very easy, this is my FAVORITE fabric (Mona by Alexander Henry-apparently it's old and not being produced any more-HUGE BUMMER!) I'm obsessed with it. I've had it for a while and when we were shocked to have a baby girl arrive, it seemed only fitting that this little peanut have my favorite fabric. I hate to admit, I actually started this quilt a while ago and used a fusible batting and it just didn't have a very uniform look, so I ripped out EVERY stitch...and those who know me will tell you...I HATE TAKING OUT STITCHES! I will do everything in my power to work through a mistake...but I will say, I am SO HAPPY that I redid this and started over (plus it gave me the chance to sew on Abigail's name!) I used orange rickrack to give it a playful, but not too girly appearance. I'm also trying to expand my quilting abilities and TRIED to quilt this in a stippled pattern. I think I still need practice, but think it came out pretty well. What do you think?


Facebook Comments Plugin Bloggerized by BloggerTricks.Biz

Crafty Sunday: Completing a T-Shirt Quilt

My husband had so many t-shirts his drawers could barely close. Many shirts he held onto for sentimental reasons, but they just took up space and were rarely if ever warn....so, I had him pull out all of the shirts he rarely or never wore and decided to make them into a t-shirt quilt.

I tried my hardest not to make myself too crazy about this quilt's design...my main goal was that he could use it while watching tv on the sofa (so it needed to be long enough!) otherwise I was just concerned that the blocks would stretch funny and not look right (since the fabric is t-shirt...) 

I ended up finding my first local quilt shop (Sew Chic in Fairmont WV) and had a chance to look around and purchased iron on lightweight interfacing....perfect for this project. 


Here's how to make your own t-shirt quilt:

You'll need: plenty of t-shirts, interfacing, sewing machine, quilting ruler, rotary cutter/mat, matching thread. 

Because the shirts came in a variety of designs, I cut them into two sizes 12.5x12.5" and 6x6" I cut the interfacing to the same size and followed the package instructions to apply it to the back of each block. The only specific request my husband had was not to cut the design of his ONE t-shirt, SO, I made that one as wide as a could, did a little math, and added some contrasting fabric to make it the width of two blocks. 

I cut 2" strips (12 1/2") long for the sashing between the blocks. (Sashing is optional, I personally just like the look.) 

Apply the sashing to the blocks. My design was 4 blocks per row, so 3 pieces of sashing. Sew all blocks into rows. Once I did that, I sewed long 2" strips and joined all my rows. 

My husband had a t-shirt with writing down both the arms, he asked if I could include those, so I cut the seams and added that in the borders. 

I cut the borders 6" wide. I mitered the corners. 

NOW, I'm piecing together all of the t-shirt remains to make backing...I figure why spend money on backing when this quilt is really more sentimental...

Next, I'll have to figure out how to quilt it...I'm so happy that I have the integrated walking foot on my sewing machine! 

I think a t-shirt quilt is a great way of "upcycling" and reusing something with sentimental value. 

Facebook Comments Plugin Bloggerized by BloggerTricks.Biz
Blogging tips